The Raspberry Pi is an excellent little computer. What if I were to tell you this website was actually hosted on a Raspberry Pi? Well, it once was. It isn’t anymore but actually once was. But anyway it is very simple to get a website running with the help of Cloudflare and a simple Raspberry Pi.
First up – ensure you have Cloudflare set up on your domain name. We’re going to be using this more for protection of your internet-facing server. You’ll also need either a Raspberry Pi or a server hosted on the internet (I am personally using a Debian VM on Linode for this guide). You may remember the guide I wrote a few years ago (here) but I no-longer recommend that as it doesn’t appear that Easyengine is maintained anymore. We’re doing this the manual way to teach you a little about Linux.
The image:
The image you need is “Raspbian Buster Lite” if you’re following this guide with a Raspberry Pi or simply, Debian 10. Flash this onto your SD card or install it on a VPS somewhere.
For the Pi – Setting up SSH:
The Raspberry Pi doesn’t come with SSH enabled by default. You’ll need to first mount the SD card on your computer and simply add the file “ssh” without a file extension, or any content to the FAT32 partition that’ll automatically get mounted on your computer. The next time you boot your Pi it’ll also start the SSH server along with it.
Securing the Pi / your VPS:
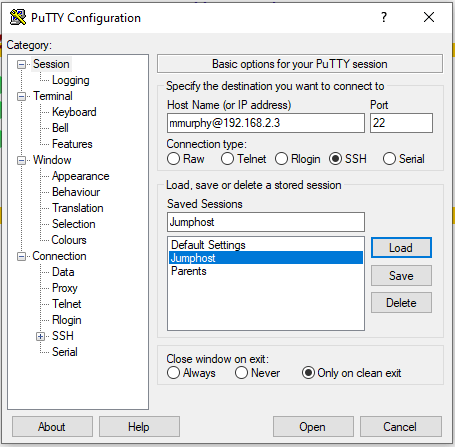
Use a client such as Putty or simply “ssh” in the MacOS terminal to access your Pi / VPS – first figure out the IP address of your Pi / VPS and log in to it:
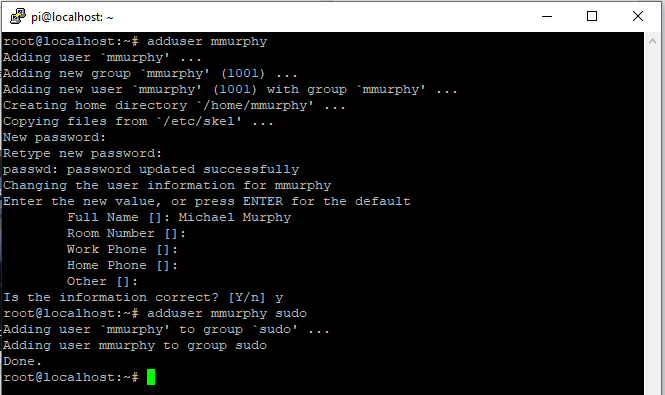
Normally, the default login for the Pi will be simply “pi” with the password “raspberry”. We can’t leave the default account on it unless if you want a pwned Pi. If you’re running with a VPS you’ll often find that your VPS provider (in my case, Linode) provisions the account called “root”.

Once you’re logged in you’ll find a lovely text based interface. Don’t run away yet, this isn’t scary. Lets secure this:
- Type “
sudo -i” – this changes to the “root shell” which is essentially the admin user for Linux. Beware, you can literally do anything under this user. - Type “
adduser username” where username is the user you’re wanting to add. In my case, I am simply going to use “mmurphy”. - You’ll need to enter a password along with your name. Not all fields are needed, you can simply press enter.
- Type “
adduser sudo” to allow this account to have root access.
Now, fully logout by typing “exit” or simply pressing “CTRL + D” a few times. Log back in under your new user and purge the user called “pi”:
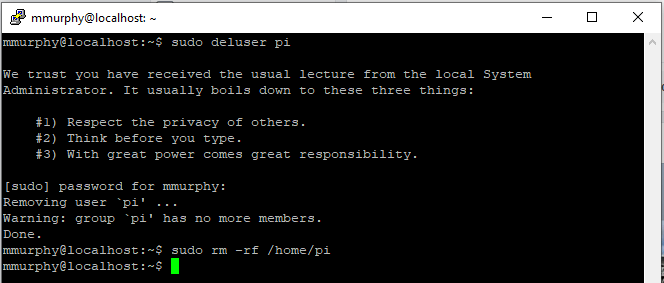
sudo deluser pi – this removes the user.sudo rm -rf /home/pi – this removes the home folder for this user.
Now that you know about user management lets move onto the next step!
Installing the required packages:
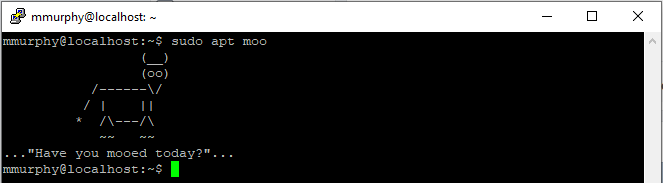
Debian comes with a built in package management utility called “apt”. It is better than other package managers because APT has “Super Cow Powers”:
Jokes aside, it is very simple to install packages. The 2 commands you’re needing are:apt update – updates the local cache of packages.apt upgrade – updates the local OS.apt install – installs a package
With Linux you can also combine commands with && – so lets do everything:
sudo apt update && sudo apt upgrade && sudo apt install apache2 mariadb-server mariadb-client php php-mysql php-curl php-gd php-mbstring php-xml php-xmlrpc php-soap php-intl php-zip libapache2-mod-php ufw
The packages we’re installing are:
apache2 – the web server.
mariadb – the database (a fork of MySQL).
php – the programming language that WordPress uses.
ufw – A simple to use Firewall.
This will ask a few (Y/N) questions along the way. It doesn’t hurt to re-run this command to ensure everything installed successfully. Once everything is installed we can continue to the next step!
Firewalling things off:
Nobody likes pwnage. That is why we’re going to firewall things off before we forward anything to your Pi.
We installed UFW above, We’re going to block off HTTPS traffic to Cloudflare only for security reasons.
Run the following commands:
sudo ufw allow ssh
sudo ufw enable
This is essentially enabling the firewall and blocking off everything except SSH. Currently the firewall is in the state it won’t even forward HTTPS traffic so we want to change that.
Run “sudo nano /root/cloudflare_ufw.sh” and paste the following:
#!/bin/sh

DIR="$(dirname $(readlink -f $0))"
cd $DIR
wget https://www.cloudflare.com/ips-v4 -O ips-v4.tmp
wget https://www.cloudflare.com/ips-v6 -O ips-v6.tmp
mv ips-v4.tmp ips-v4
mv ips-v6.tmp ips-v6

for cfip in `cat ips-v4`; do ufw allow from $cfip to any port https; done
for cfip in `cat ips-v6`; do ufw allow from $cfip to any port https; done

ufw reload > /dev/null
Write the file with “CTRL + O” and exit with “CTRL + X” – you’ll note commands are at the bottom of Nano. You’ll now need to make this executable so run “sudo chmod +x /root/cloudflare_ufw.sh” then run it with “sudo bash /root/cloudflare_ufw.sh” – this pulls the Cloudflare IP rules from Cloudflare and allows them in your firewall.
Lets automate this to run nightly – run “sudo crontab -e” – when it asks you what text editor you want just select nano.
Use “CTRL + V” to put your cursor to the bottom of the page and paste the following:
0 0 * * 1 bash /root/cloudflare-ufw.sh > /dev/null 2>&1Press “CTRL + O” to write followed by “CTRL + X” to exit. Congrats, you’ve now firewalled off your system.
Configuring Cloudflare:
I’m going to assume you’ve already got a domain name and Cloudflare set up on it.
First, you need to add your records to your host. If you’re hosting this from home you need to forward Port 443 (HTTPS) over to your Pi and potentially ensure it has a public IP address. You’ll need to next grab your public IP address – simply go to https://ipv4.icanhazip.com to show this.
Add your first record to your domain name – the record type is A, name as @ and the public IP address – press Save after this:

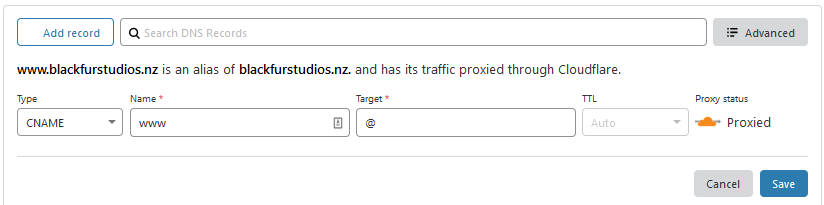
The second record is simply a CNAME for WWW, the Target is @:
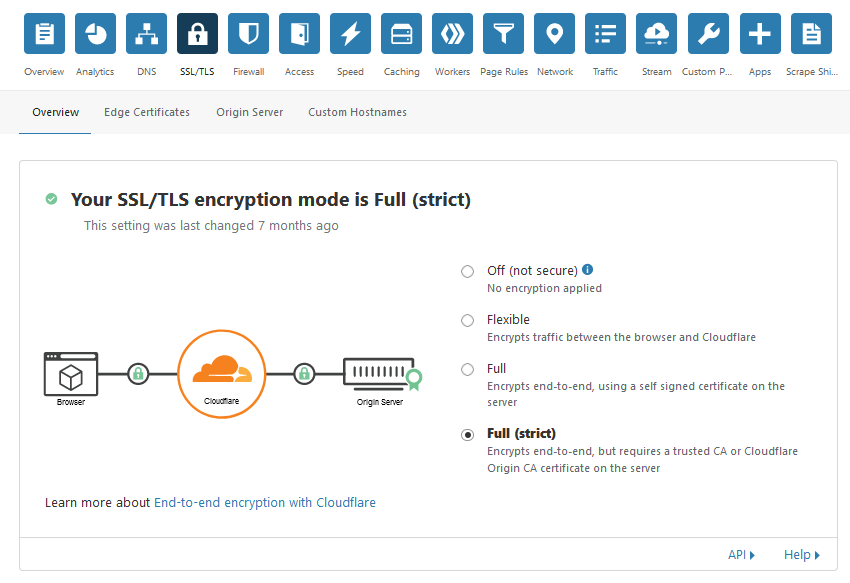
Hit save again – next go to SSL / TLS on the top bar and change your SSL/TLS encryption mode to “Full (strict)”:
Go to “Edge Certificates” near the top:
– Enable “Always Use HTTPS”
– Set “Minimum TLS Version” to “TLS 1.2”
– Disable Opportunistic Encryption
– Enable “Automatic HTTPS Rewrites”
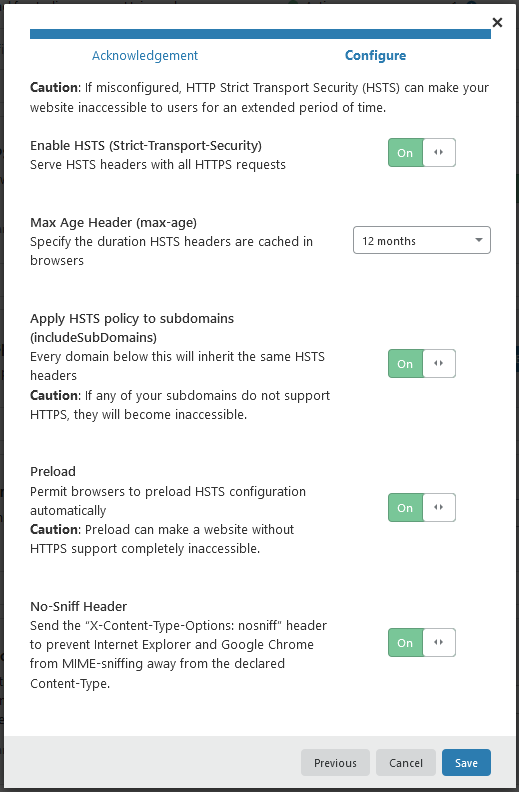
And now, scroll up again to HTTP Strict Transport Security (HSTS) and click “Enable HSTS” – we’re going to enable this to ensure your site is always using HTTPS. Configure it as so (Note, by doing this it’ll prevent your domain working over HTTP – this isn’t a bad thing, but you need to ensure that everything going forward has valid HTTPS certificates):
Now, lets create an origin certificate for your server – this is a SSL certificate your server uses to talk to Cloudflare. Go to the Origin Server tab at the top and simply hit “Create Certificate”:
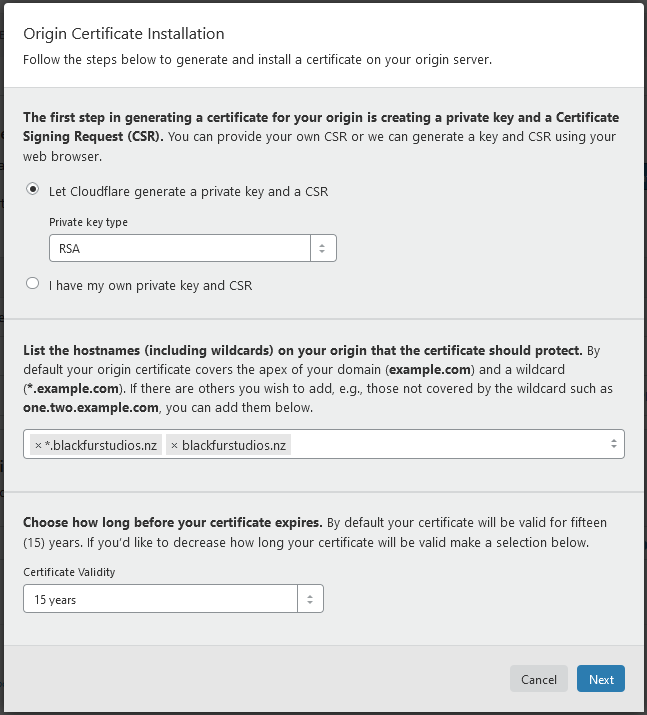
Just hit next on this page – it’ll then show some certificates – you’ll need to do some work on your server here:
sudo mkdir /etc/apache2/ssl
sudo nano /etc/apache2/ssl/cloudflare.pem
Paste the first key (Origin Certificate in full) into this Nano screen – write out with “CTRL + O” then “CTRL + X”.
sudo nano /etc/apache2/ssl/cloudflare.key
Paste in the 2nd key (Private key in full) into this Nano screen – write out with “CTRL + O” then “CTRL + X”.
Once you’ve done this just simply hit OK on the Cloudflare page. The next option down is “Authenticated Origin Pulls” – simply enable this.
Lastly, go to “Page Rules” and add a new rule – your new rule should be http://*example.org/* where example.org is your domain. In the drop-down box below this select “Always Use HTTPS”:
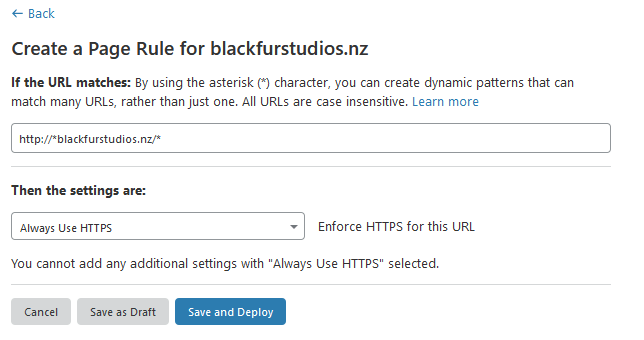
Now “Save and Deploy” – Congrats, you’ve configured Cloudflare for your site!
Configuring your Server:
The next step is to setup WordPress and configure the web server. First off, lets grab the WordPress installer and put it in the right place – simply run the following:
sudo curl https://wordpress.org/latest.tar.gz -o /var/www/wordpress.tar.gz && sudo tar -zxvf /var/www/wordpress.tar.gz -C /var/www/ && sudo rm /var/www/wordpress.tar.gz && sudo chown -R www-data:www-data /var/www/wordpress && sudo find /var/www/wordpress/. -type d -exec chmod 755 {} \; && sudo find /var/www/wordpress/. -type f -exec chmod 644 {} \;This will simply download and extract the latest version of WordPress and set the correct permissions.
Next step is to setup Apache – run the following to enable the right mods:
sudo a2enmod headers rewrite sslNow lets secure Apache a little –
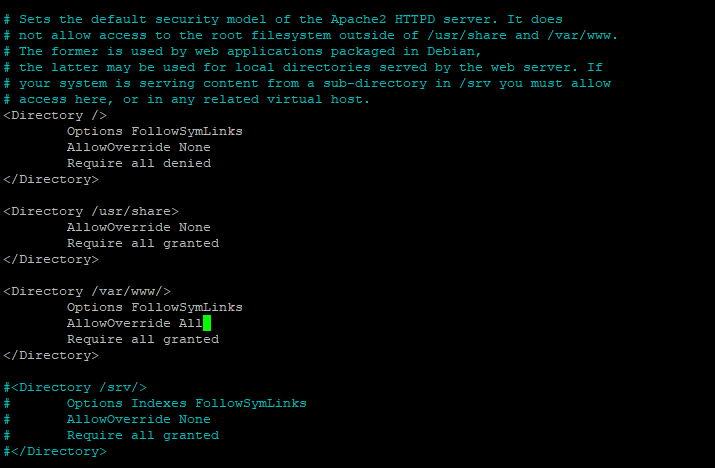
sudo nano /etc/apache2/apache2.conf
Now lets jump to Line 171 – Press “CTRL + /” on your keyboard and type 171. You should be around the following line – if not, just look around for it:
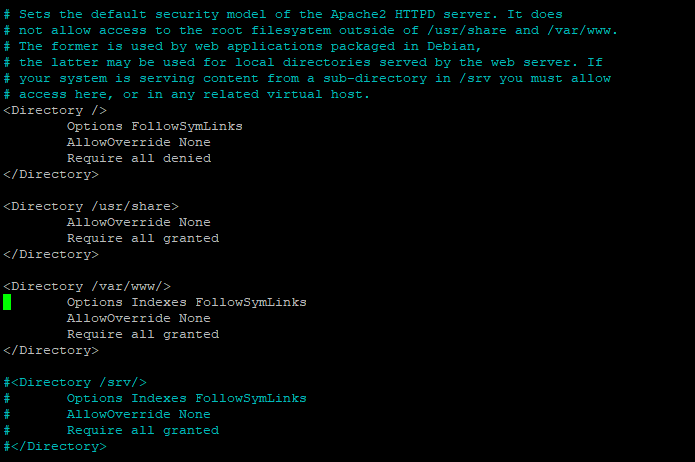
We want to remove Indexes from this – use your keyboard arrow buttons to go across to Indexes and simply delete it out just as you would with any standard text editor. Now go to the AllowOverride line and change this to AllowOverride All. It’ll look like this when you’re done:
Save and exit – we’re done with this file. The next file to edit is located at /etc/apache2/conf-enabled/security.conf – give this the Nano treatment. The lines we want to change are located on 25, 36, 63 and 70. If you remember before you can jump to a line by using “CTRL + /”
- Change
ServerTokens OStoServerTokens Prod - Change
ServerSignature OntoServerSignature Off - Uncomment the 2 header lines near the bottom of the file by removing the #:
Header set X-Content-Type-Options: "nosniff"Header set X-Frame-Options: "sameorigin"
Save and exit Nano once you’re done – this is essentially making it more difficult for anyone to guess the version of Apache you’re using and making it harder for anyone to browse directories within your WordPress installation.
Now run the following:sudo a2dissite 000-default
This disables the default site – we’re not going to be needing it as we’re creating something new. Next, run sudo nano /etc/apache2/sites-available/wordpress.conf and paste in the following editing your site URL:
<IfModule mod_ssl.c>
<VirtualHost *:443>
        ServerAdmin [email protected]
        ServerName yoursite.nz
        ServerAlias www.yoursite.nz
        DocumentRoot /var/www/wordpress
        LogLevel info ssl:warn
        ErrorLog ${APACHE_LOG_DIR}/error.log
        Header always set Content-Security-Policy "default-src https: 'unsafe-inline' data: 'unsafe-eval'"
        CustomLog ${APACHE_LOG_DIR}/access.log combined
        SSLCertificateFile /etc/apache2/ssl/cloudflare.pem
        SSLCertificateKeyFile /etc/apache2/ssl/cloudflare.key
        Header edit Set-Cookie (?i)^(.*)(;\s*secure)??((\s*;)?(.*)) "$1; Secure$3$4"
        SSLVerifyClient require
        SSLVerifyDepth 1
        SSLCACertificateFile /etc/apache2/ssl/origin-pull-ca.pem
</VirtualHost>
</IfModule>
# vim: syntax=apache ts=4 sw=4 sts=4 sr noet
Take note of the first lines – add your email and site name in this file. Save and exit once you’re done. We’re also going to have to grab the file “origin-pull-ca.pem” from Cloudflare:
sudo curl https://support.cloudflare.com/hc/en-us/article_attachments/360044928032/origin-pull-ca.pem -o /etc/apache2/ssl/origin-pull-ca.pem
After this – we’re actually going to secure the SSL directory off as we don’t need anyone else reading it:
sudo chown -R root:root /etc/apache2/ssl
sudo chmod -R 600 /etc/apache2/ssl
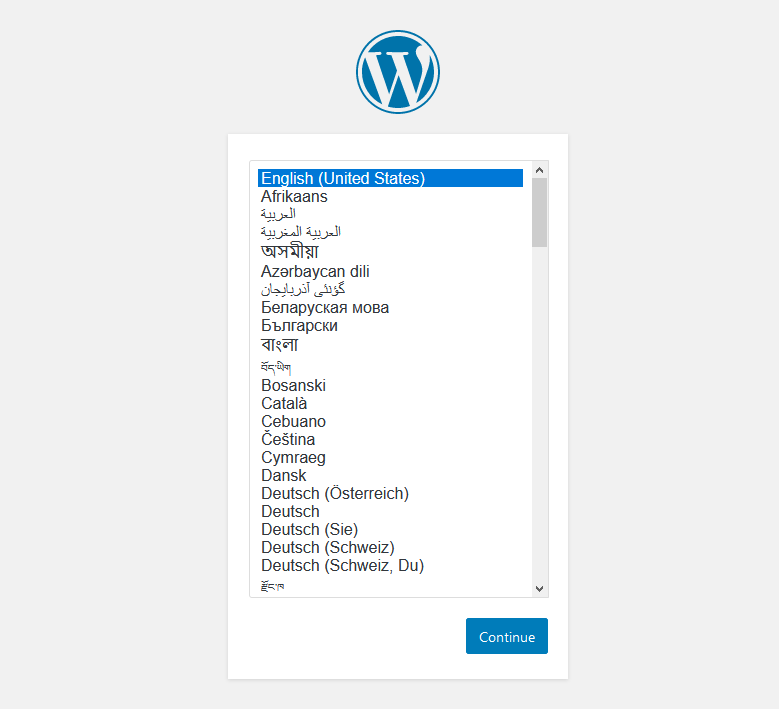
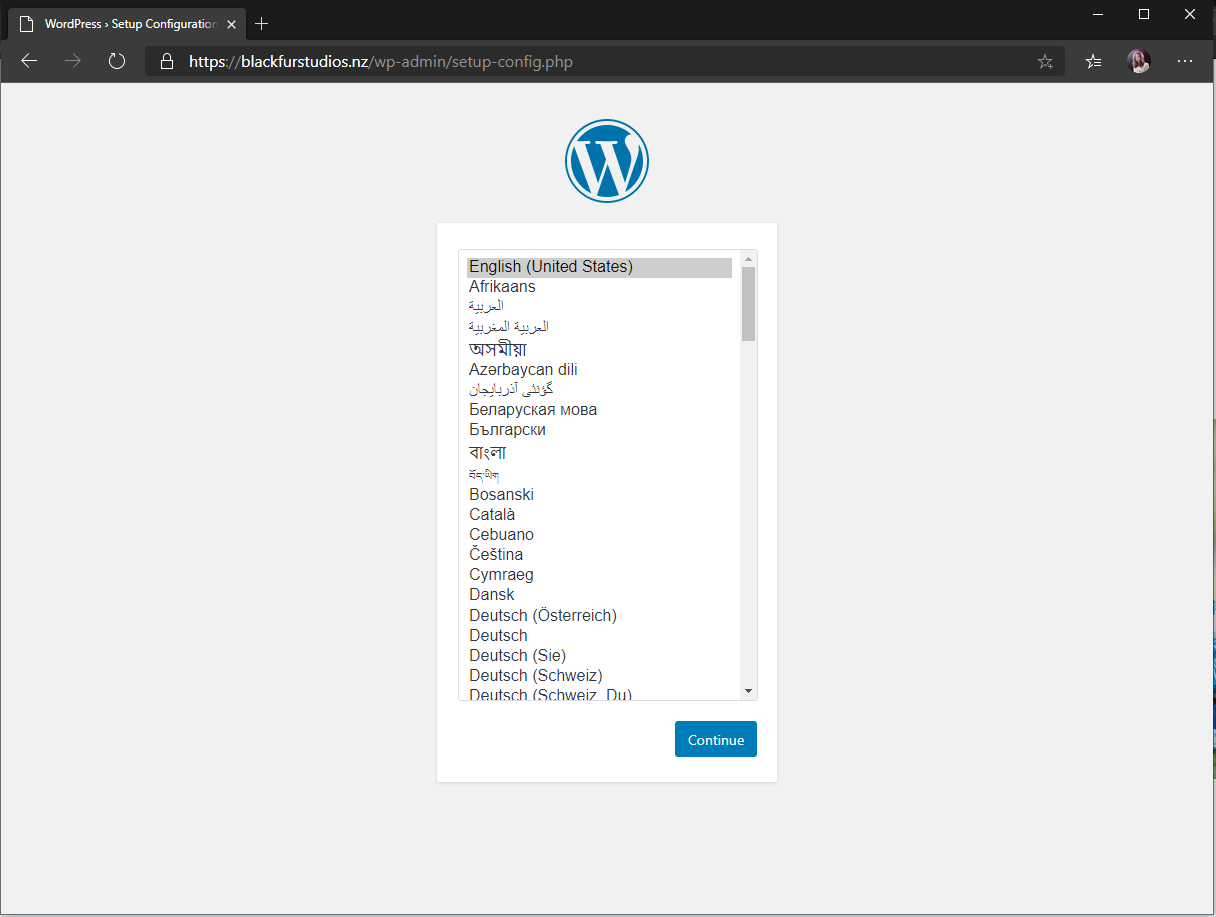
Now, enable your site by running “sudo a2ensite wordpress” and restart Apache by running “sudo systemctl reload apache2” – if you followed everything correctly you’ll now be presented with the WordPress setup if you visit your site:
We’re however not quite finished yet as we don’t have a database setup yet. Lets change that and stop Apache for now with “sudo systemctl stop apache2“
Setting up MySQL:
This part is actually pretty straight-forward but it is vitally important you use secure passwords here. I personally use Lastpass to generate something long and random but if you don’t have that then a fun way to generate a secure password is at https://www.toddlerpassword.com/generate
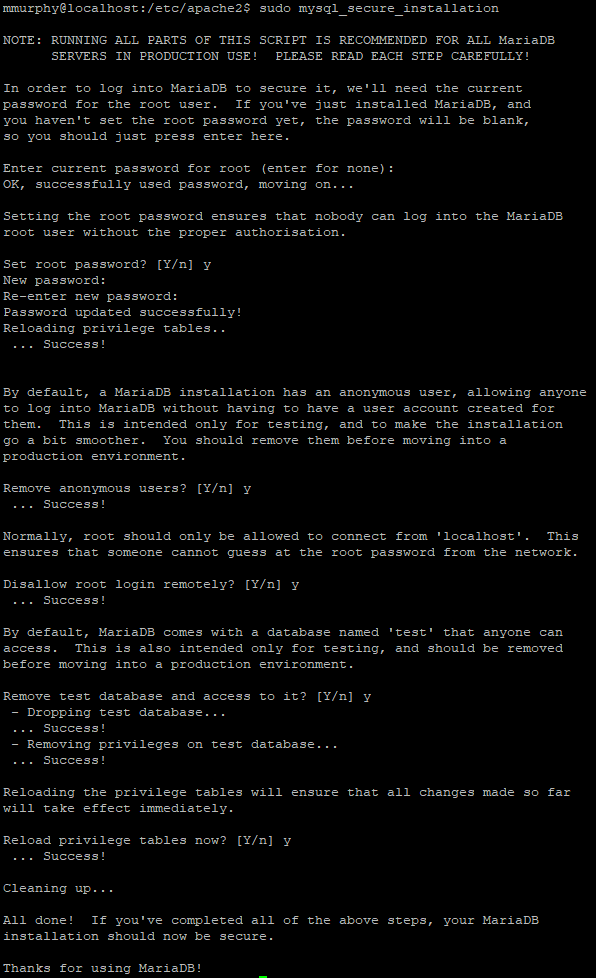
Run “sudo mysql_secure_installation” first – this just secures MySQL off. Follow through this and generate a long, secure password for the Root user:
Now we’ve done this lets create a new database for WordPress. Simply type “sudo mysql” to bring up the MariaDB shell. Run the following (ensuring you’re creating a secure password different from the Root user) and replace databasename + wordpressusername with a custom name for your database and database username:
CREATE DATABASE databasename;
GRANT ALL PRIVILEGES ON databasename.* TO "wordpressusername"@"localhost" IDENTIFIED BY "securepasswordhere";
FLUSH PRIVILEGES;
EXIT
It’ll look something like this:
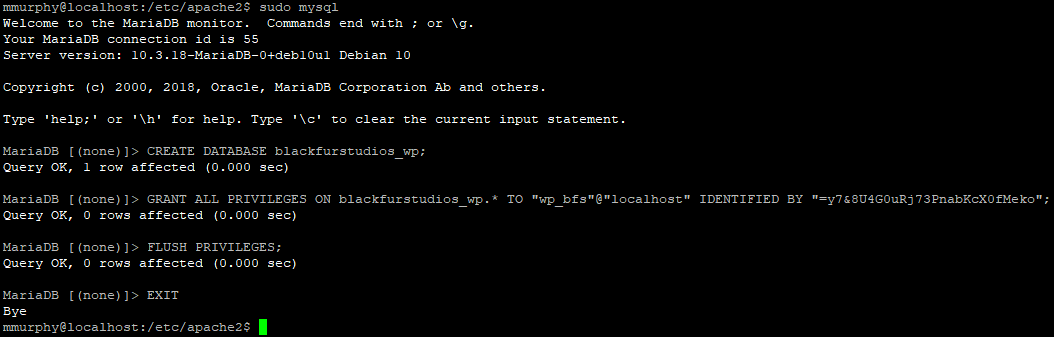
Do ensure you make note of the database name, the username you decide to use along with the password – we’ll need this shortly.
Setting up WordPress!
Now, start apache2 and proceed on with the WordPress setup:
sudo systemctl start apache2
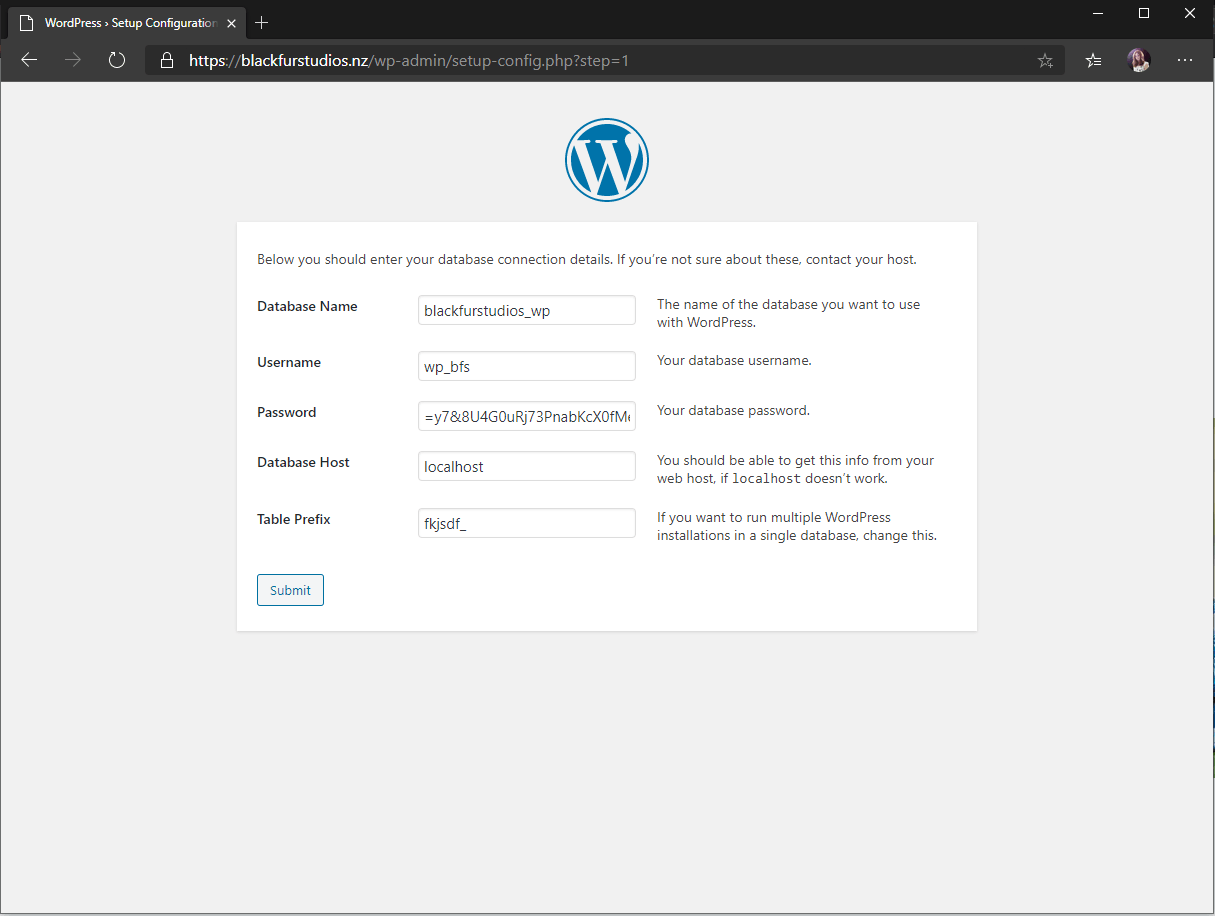
A note on the Table Prefix – I do like to mix this up – just type something short, sweet and random before the underscore. Once you’ve done this you’ll be greeted with this screen:
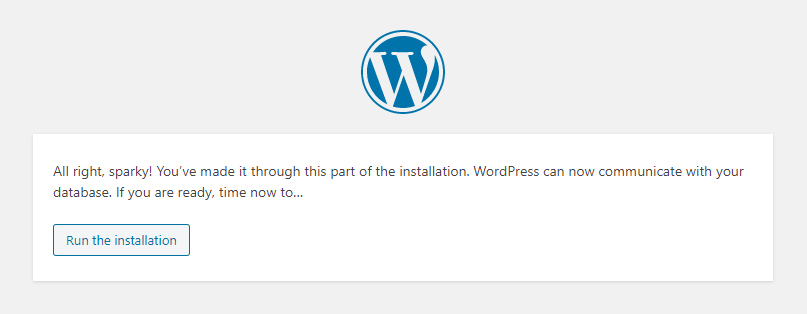
The next step is simply to configure your administrator account and site details – congrats! You’ve just set up a Linux server, from scratch and installed WordPress. Hopefully you’ve learnt a little about Linux in the progress also.
Lastly, I recommend installing the following WordPress extensions:
WPBruiser: https://wordpress.org/plugins/goodbye-captcha/
Companion Auto Update: https://wordpress.org/plugins/companion-auto-update/
WP-Optimize: https://wordpress.org/plugins/wp-optimize/
Enjoy!